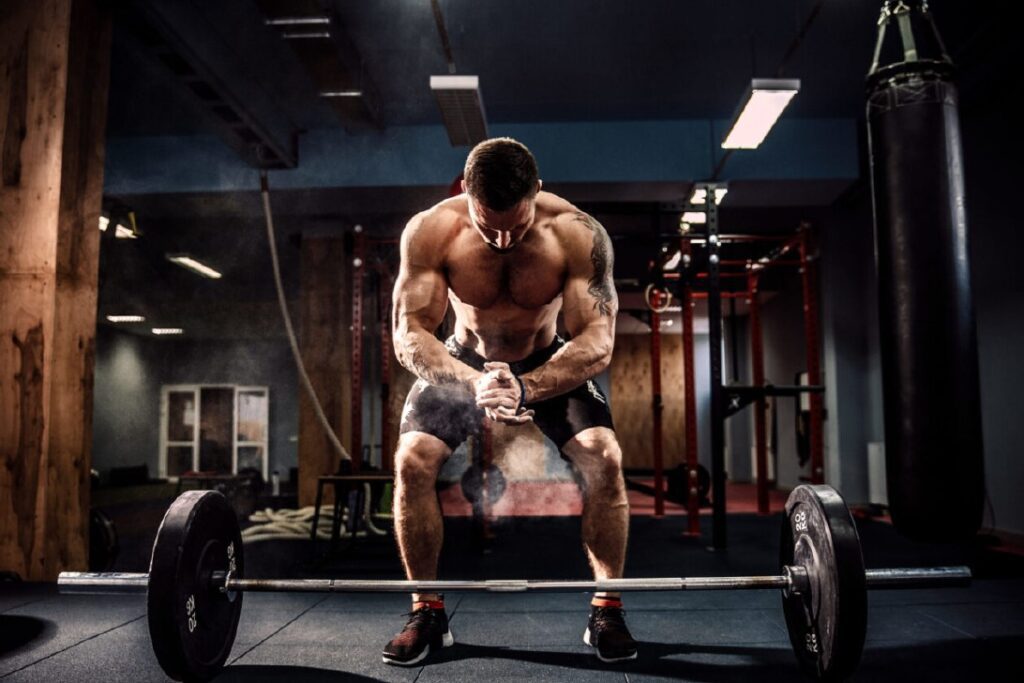
Mobility is Functional Life
Have you ever come into a training session sore, tight, immobile, with pain and had it take away from the quality of your workout? Maybe the pain is so bad that it prevents you from even coming to the gym in the first place? This warm up routine will help relieve pain and optimize the way you feel before you even start exercising!
By doing these 9 warmup movements before your workout, you’ll not only decrease discomfort and pain, but also put your body in its optimal state – meaning you’ll be able to exercise harder and lift heaver – and in turn see results more quickly!
EXERCISE QUICK GUIDE:
(pro tip: there’s a lot more to foam rolling than you’ve probably heard! – We’ll describe Muscle Mobility Checklist here)
- 1. Roll out feet
- 2. Foam roll calves
- 3. Foam roll quads
- 4. Foam roll glutes
- 5. Foam roll inner/outer quads
- 6. Foam roll back
- 7. Banded shoulder stretch 1
- 8. Banded shoulder stretch 2
- 9. Quad buster
- Bonus: hanging leg raises
Realistically you don’t have to do every single exercise before your workout; but do make sure to do the movements that are relevant to your exercise planned for the day. For example, if you’re doing cardio or a leg workout then foam roll your legs. Set aside 5-15 minutes at the beginning of every workout for these exercises. Try them out and feel the difference!
Introduction to Bodywork/Foam Rolling
Bodywork and foam rolling are a game changer for 99.9% of people, and both fall into the category of myofascial release. This means we are melting away some of the excessive connective tissue (fascia) that forms due to over/underuse from sitting, using a phone or computer, studying, working out, walking, etc. Basically anything we do is going to take its toll on our body! This causes muscle stiffness, tightness, and immobility.
How many of you have ever experienced this stiffness, tightness, and immobility? When you can open up tight or overactive muscles before a workout with bodywork, then stretch them to ensure you have proper posture, you reduce the chance of injury and help yourself build a balanced, functionally fit body with longevity, so you can continue to look good and feel good for years to come! Always foam roll or get bodywork done before stretching and especially before working out to maximize your results.
One of the most important certifications a trainer can have is an Adaptive Bodywork Certification, which requires a hands-on, in depth 20 hour course, and teaches a trainer how to help their client perform active pain relief in a matter of minutes. Many Iron Orr Fitness Personal Trainers are Adaptive Bodywork Certified. However, foam rolling is something you can do on your own if you don’t get the chance to work in person with an Iron Orr Fitness Personal Trainer. While working with a fitness coach will always be better for releasing tight muscles, the foam rolling techniques described here approximate these techniques and are very useful to do on its own.
FOAM ROLLING PRO TIP:
The underlying principle behind performing effective bodywork and foam rolling is pinning down the tightest/most tender spot(s) of the muscle with an object hard enough and with the right shape to pin that particular muscle down, and extending the muscle through a full range of motion, in all planes of movement (forward and back, side to side, and twisting). It\’s the applied pressure plus range of motion that makes all the difference, not rolling back and forth.
1. ROLL OUT FEET
When foam rolling or doing bodywork, you always want to start from the ground up. Rolling out your calves is usually the best place to start if you are short on time, but if you have plenty of time you can start by rolling out your feet with a lacrosse, tennis, or soft ball.
Again, find the tightest spot(s) with the object, whether it’s a ball or a roller, whichever you feel you can hit that spot best with, and apply enough pressure where it hurts a bit and feels tender, but not so much that you tighten up and are overwhelmed. It should “hurt good” so to speak, not “hurt bad”.
From there, stretch your foot in all ranges of motion – being mostly foot flexion and foot extension. Point your toes down, and then up, on the ball 10 times on each tight spot.
2. FOAM ROLL CALVES
Next is the calves, same deal, use a roller to find the tight spot(s) in your calf, apply “good pain” pressure, and do 10 reps of taking the ankle forward and back, then 10 of side to side, then 10 of twisting.
3. FOAM ROLL QUADS
The next commonly tight muscle group is the quads. This one takes a while, and it is arguably one of the most important as well. Roll out the front of your thigh with a foam roller and identify the tight spots.
There will probably be a lot of them. On each spot, bend the knee as far as you can, then straighten your leg 10 times on each tight spot. After you’ve done calves and quads, stand up and take a brisk walk across the room and back to get some blood flow. Hydrate – drink lots of water! Theoretically you’ve just released toxins from the tight muscles!4. FOAM ROLL GLUTES
Next up we want to roll the glutes. Have a seat on the roller or ball depending on which provides the intensity you need and roll over your glutes, the big muscle of your buttocks. Identify the tightest spot(s) and extend your leg and hip out fully, then bring your knee to your chest, bending your hip as much as possible. 10 times each tight spot. Take a walk and enjoy how amazingly free, open, and loose you feel!
5. FOAM ROLL INNER/OUTER QUADS
The same can be done on your inner and outer thighs (adductors and IT bands, respectively). One thing to note about the outer thigh, the IT band, is that when you assess where it is tight, you’ll notice there’s a band of extremely tender tissue between the iliac crest of your hip and the outer side of your knee, next to your shin.
This is your IT band and you shouldn’t roll directly on it because it isn’t a muscle, it is a piece of connective tissue. The IT band actually sits on top of your outer quad and over time, due to overuse or underuse, becomes somewhat stuck to that outer quad muscle and reduces mobility, pulling on your back, hips, and knees.
You want to roll right in front of the IT band with a roller and do those leg extension movements, then take a softball and roll out the back of the IT band, with the same motion, while seated. For best results, comb along the IT band, front and back, all the way from your hip to your knee, performing extensions of the knee throughout the entire “combing”. This one hurts quite a bit but bear with it, the results are profound!
There are a couple other foam rolling techniques we will cover in future blog posts or by request, but for now, start doing these consistently and watch your mobility, recovery, and any chronic pain improve dramatically!
While it would be beneficial to do these every day, realistically I only do these about twice a week. Once leg day and maybe another day of the week. These are great but as a busy fitness professional, I don’t always have time. Most of us lead busy lives and don’t have time to do all of these every time, so initially for about 2-3 weeks it would be great to do these every week, then maintain with once or twice a week. If not, once or twice a week should be fine.
However, the next few warmups I talk about are 100% crucial to do every single time before you lift weights. There have been times I’ve been in a rush and every single time I neglect to do these, something hurts, back, knees, shoulders – ever since I learned how to warmup properly I can never go back to working out without a full and proper warmup.
The same applies to my trainees, I won’t let any of my clients or athletes start their workout without a proper and full warmup of the following exercises, because it is my responsibility as a personal trainer and professional fitness coach to ensure those who I train are always optimal, always have the best workout possible, and never get injured even when we push past their limits.
6. FOAM ROLL UPPER BACK
One of my favorites is the upper back opener. Roll out your upper back with a foam roller a couple times to get some blood flow. Once that feels good, pause at the lowest spot of your upper back, right before it becomes your lower back. You will find the roller between your lower back and your shoulder blades.
Pin this spot down with the roller, anchor your buttocks on the ground, put your hands behind your head, and slowly bring your head down to the ground without letting your buttocks rise off the ground. Try to touch the ground if you can, and repeat this motion 10 times.
On the 10th time, stay at the bottom with your head as close to the ground as possible, and perform 10 side bends, bringing your elbow towards your hip, then switching sides, performing a side to side motion.
Last, we perform a twisting motion in which we bring one elbow to the sky and the other to the ground, again 10 times!
Stand up afterwards and you might feel a little bit taller, your upper back is open, and your spine is in line! This is crucial because you will now have a safer back position on squats and deadlifts, and a safer/more optimal shoulder position on bench and overhead press. We spend hours sitting slumped over every day and this helps overtime to correct it!
7. BANDED SHOULDER STRETCH #1
Next up: the band shoulder stretch. When I was training for San Diego’s largest open powerlifting meet back in 2017, I experienced injury after injury from going too heavy too quick, pushing past my limits, but never stretching or taking care to rehab and prehab my body. The first thing they taught me is the band shoulder stretch, pictured here:
This can also be performed with a doorway if you don’t have a band yet, or with the side of a squat rack. Start by grabbing the band/doorway/squat rack/anything you can grab onto and lean back with your hips, stretching your back. From there, alternate stepping back as far as you can with the left and the right foot 10 times, you’ll feel your back stretching different angles.
From there, cross one leg in front of the other 10 times. Lastly, bend forward, reach your hand and your head under your arm as far as you can, twisting your torso as much as you can, then stand up straight and reach back as far as you can, do this 10 times. You’ve now mobilized your back in all planes, forward and back, side to side, and twisting!
8. BANDED SHOULDER STRETCH #2
Now, grab the band and face away from it, or grab the top of a doorway, pull up bar, or squat rack, and bring your body forward until you feel your armpit stretch and your shoulder blade rotate back.
If you feel any pinching, change the direction your hand is facing to remove the pinch. From there, same deal, alternating steps forward 10 times, crossover the leg 10 times, and reach/twist 10 times as far one way and as far the other way as you can. Your shoulder blades are now back and your rotator cuff is mobilized.
9. QUAD BUSTER
Finally, a stretch one of my clients calls the QUAD buster!!! This stretch will absolutely destroy your quads the first 2-3 weeks you do it and you’ll need multiple breaks between reps/steps, but then it becomes easy and you’ll barely feel it at all in the quads. It’s a workout and stretch in 1! As one of my clients once said.
This one is a little bit technical. Take a band and fasten it between knee and hip height on a squat rack or pole. Put the band right under your pelvis so you can sit back on it. Walk back so it can support your weight and sit so your hips are below your knees, hold the band next to your hips so you don’t fall, and get your spine as vertical as possible, perpendicular with the ground.
From there, we shift our weight/hips forward and back, keeping our heels and toes down. Try to point your toes completely straight and not in or out. You’ll feel your hips stretch.
After 10 weight shifts forward and back, go side to side 10 times.
Finally, read this next part carefully because most people even working with a professional fitness coach get this wrong the first time. Take your elbow and put it on the inside of your thigh, right on the inside of your knee, and push off it, keeping your foot down.
Use that push to extend your opposite arm straight back, reaching as far back as you can, and using the push off your elbow on your knee to get further back, then once you reach end-range, reach as high up as you can with that same arm that just reached back. You may hear your back pop and it’s going to feel amazing! Do these 10 times, stand up and enjoy your new hips. They’ll feel amazing!!!
Alright, at this point your shoulders and hips are 90% fully mobilized, which is a lot better than the 0-10% most people mobilize in their warmup. Some people warmup as well as 20-30%, but rarely do I see anyone warmup this thoroughly.
There are many other stretches to get that last 10%, and if you have a specific injury or mobility impairment/postural distortion, you will need additional stretches/exercises. If this is you, hire a knowledgeable fitness professional, either a personal trainer, fitness coach, or personal fitness trainer with certifications in either corrective exercise, or with a physical therapy background, for specifics. At Iron Orr Fitness, you can find trainers with such certifications/backgrounds.
Finally, if you spend more than 30 minutes a day sitting, which I could easily bet you do, I’d recommend doing 10-15 hanging leg raises to take your pelvis from a position of tilting forward, to a position of neutrality. This will activate your core and ensure that it stays active while you lift. For more info on how to keep your core active during your lifts or how to do more stretches, see our future blog posts!
Iron Orr Fitness is extremely proactive about ensuring that our clients use optimal form and stay injury free. One of the greatest benefits of investing in a personal fitness trainer is getting a much better quality of workout and seeing significantly better progress than if you worked out on your own, and one of the greatest values we can offer is a proper warmup and proper form!!!
Unfortunately, a lot of people, including trainers in many gyms I’ve been to, neglect performing a proper warm up before having their clients and athletes do exercises that can be dangerous if you don’t warm up properly after a day sitting in front of the computer in the office (or after training hard for weeks on end, to offer the other end of the spectrum). This is why at Iron Orr Fitness we hold 2 hour meeting every single Friday for the entire time they work at Iron Orr, as well as weekly 1-1 meetings to continuously learn more and more about training and customer service.
What if you don’t live in San Diego? That’s ok, we can still teach you – we can communicate online, and it all starts with learning how to warm up properly from this blog post!
Thank you, leave feedback, and stay tuned for more amazing content from Iron Orr Fitness, San Diego’s Team of Top 5 Best Personal Trainers, Voted a Top 5 Best Personal Training Business in San Diego, new blog posts every other week!